ummer seems like it might be starting to wind down, though it pains me to say. Still, I'm not giving up without a fight, and a fruity cocktail sounds like the perfect way to ignore the impending season change. I'm a firm believer that we shouldn't start thinking about fall until September at the earliest, and that's over two weeks away, so I'll be over here in summerland until then.
Still, September is still pretty summery in my mind. I've been wanting to take a little road trip lately and my options are south or east (I still haven't updated my passport to my new married last name, so Canada is off the table), and south seems most interesting to me. I haven't been down 101 since I drove down in the Winne and, while 101 is gorgeous, some of those twisty roads just aren't ideal in a 20 ft long 1973 Winnebago. Little roadsters trying to zip along those roads were not my biggest fan. Ever since I stopped in Mendocino in the Brave I've wanted to go back because the day I spent there it was totally socked in and rainy. It'd be fun to be able to give it another try with (hopefully) better weather. We'll see, though. I feel like I booked myself solid until November, so it might be challenging to get out of town. I've decided that I'm not booking anything in November, November is going to be my month. Hopefully there'll be some fun for our third wedding anniversary and family time for Thanksgiving!
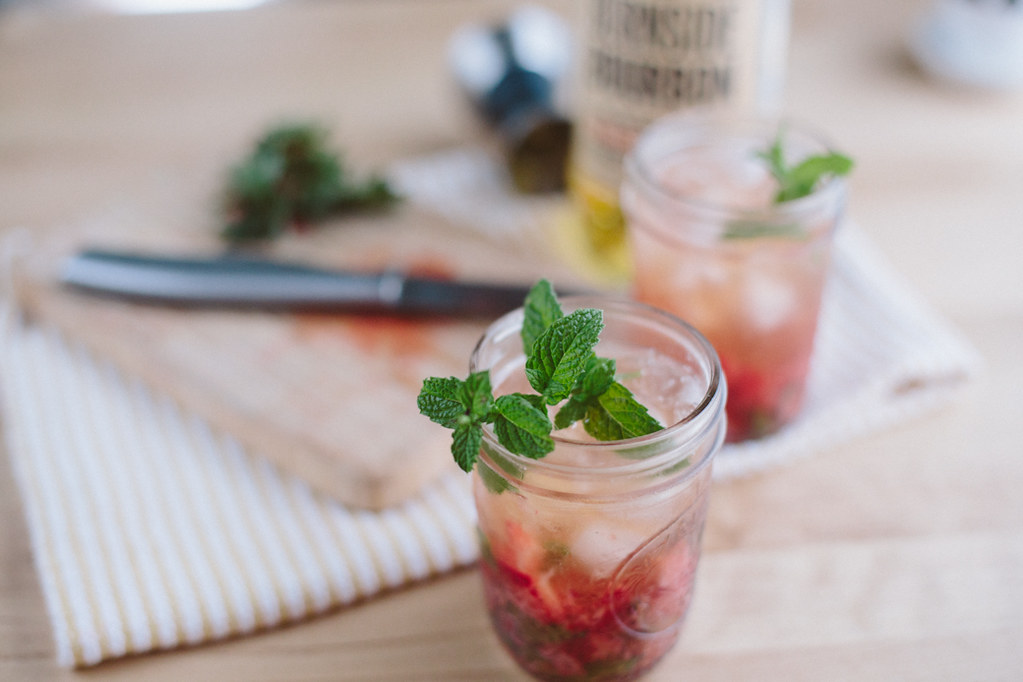
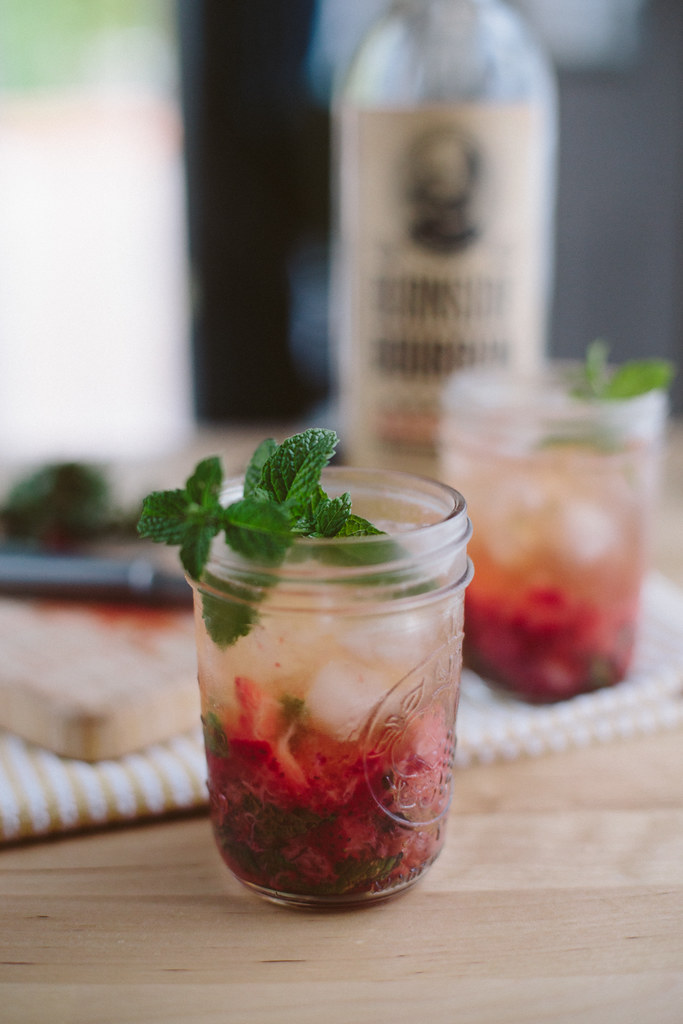
INGREDIENTS
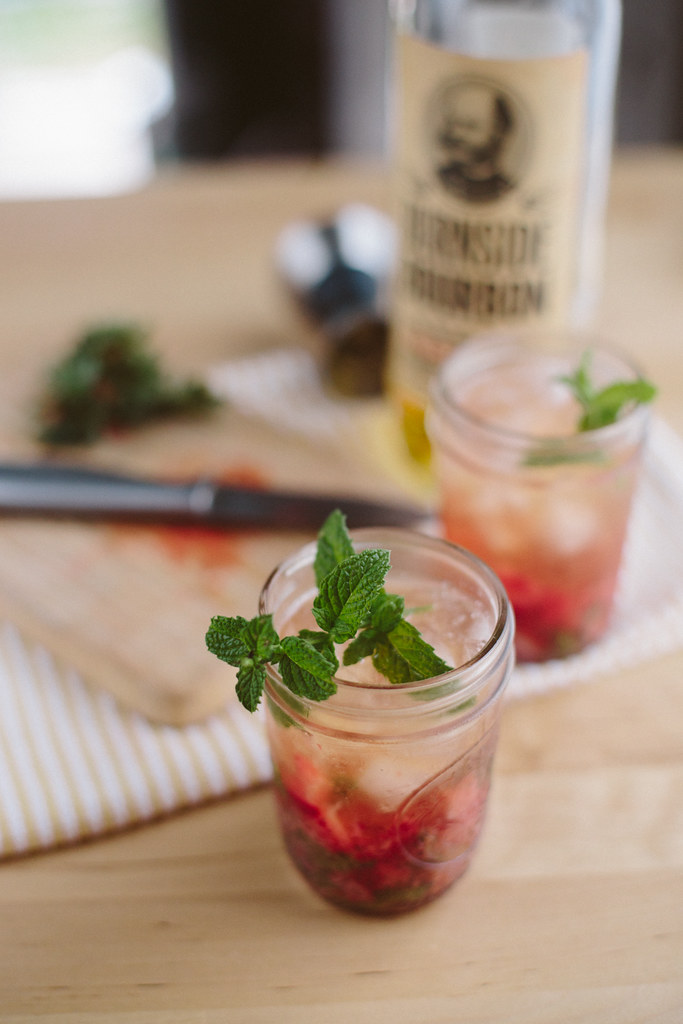
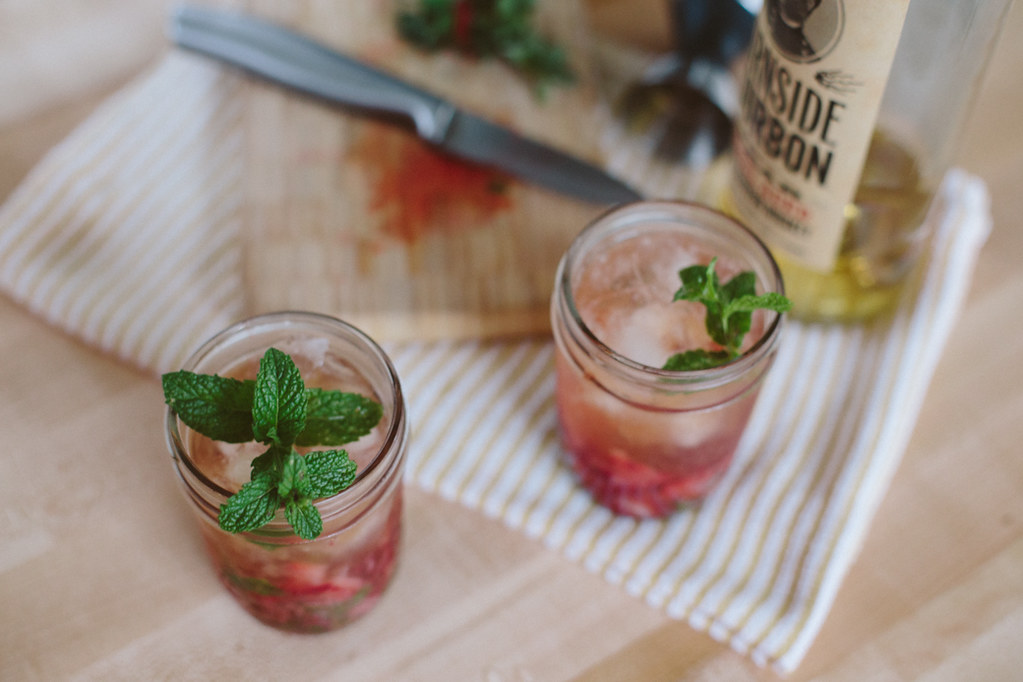
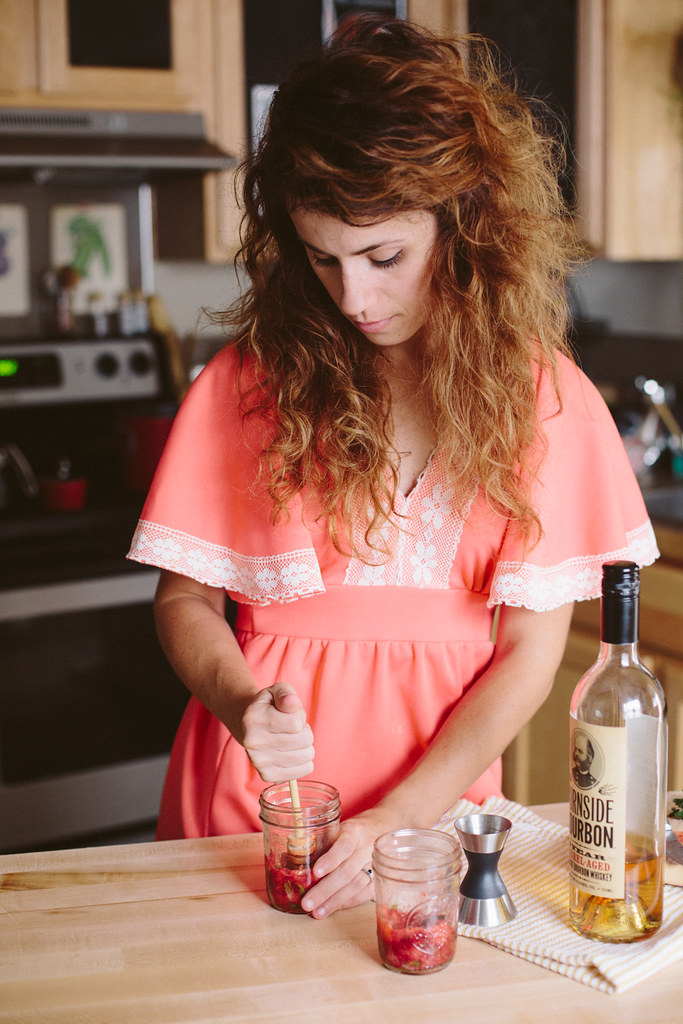
4 hulled strawberries
2 tbsp mint leaves
1/4 oz simple syrup
2 oz bourbon
crushed ice
mint sprig
Muddle the strawberries and mint leaves in your glass and add the simple syrup. Top with the bourbon and crushed ice and garnish with the mint sprig! Enjoy!

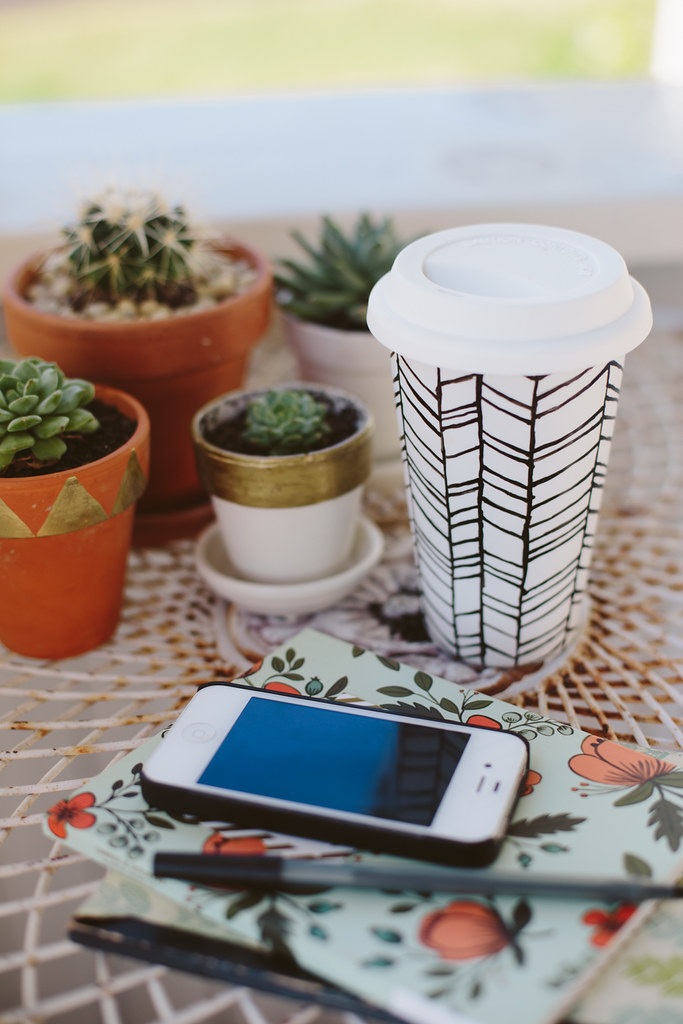

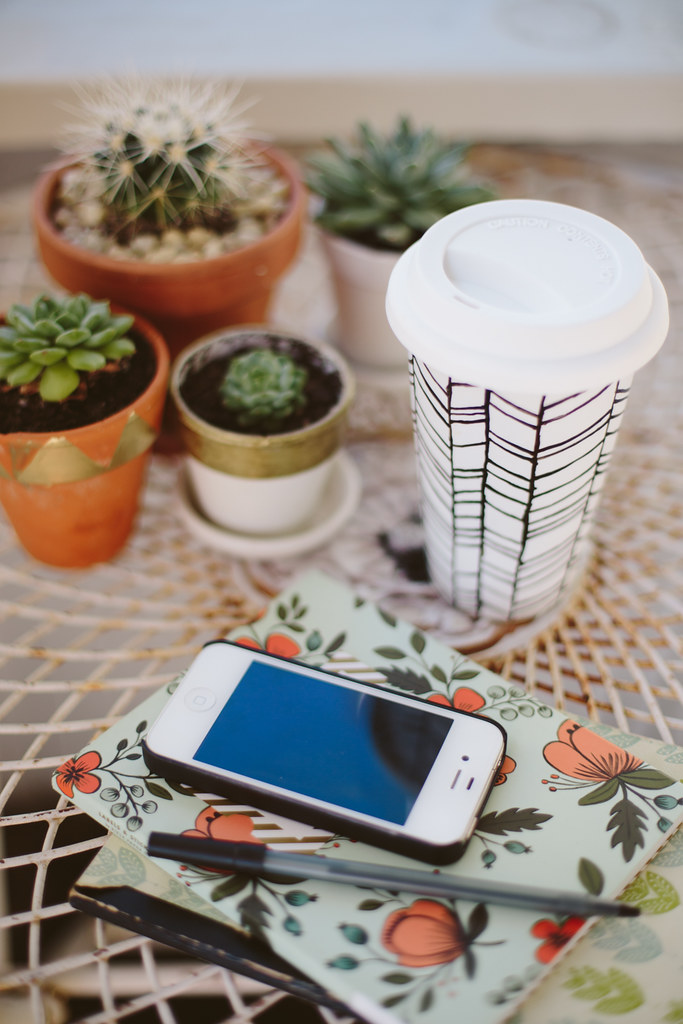
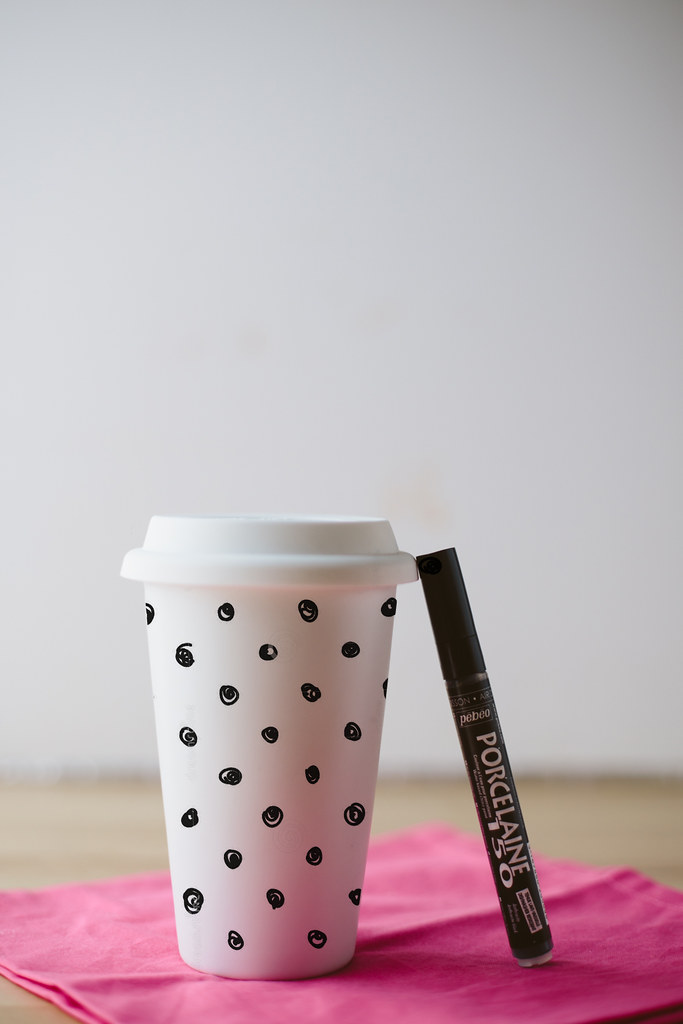
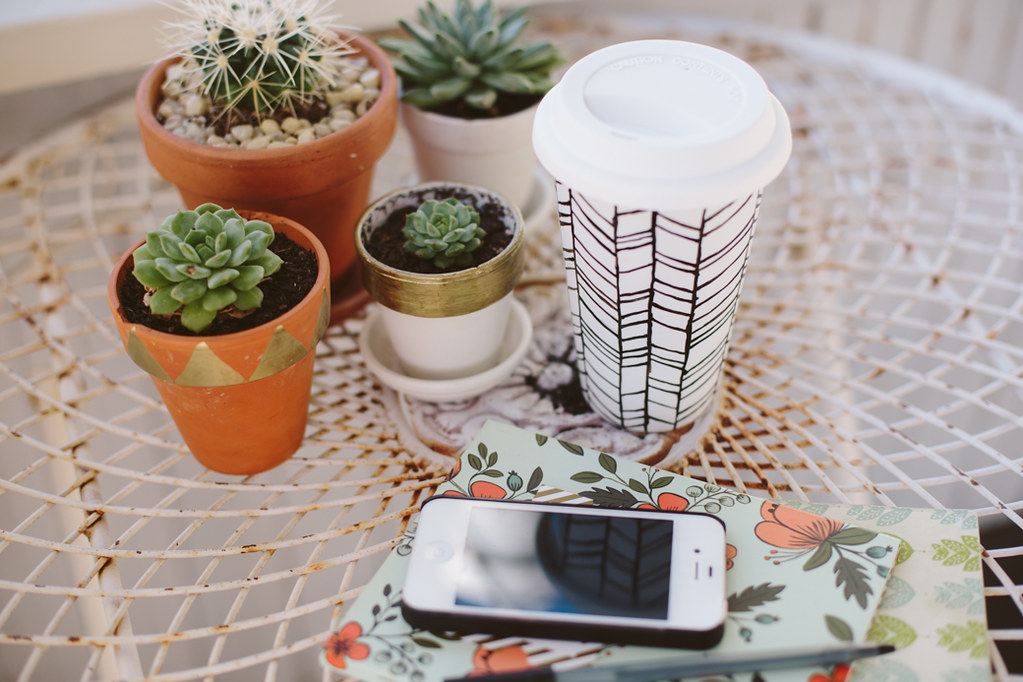
his DIY has been on my mind for over a year and recently, when I was cleaning out my studio, I found my porcelain paint pen and days later found a blank travel mug at the thrift store. It seemed like it was meant to be. I don't know about you guys but I see these little faux-paper cup travel mugs at thrift stores all the time. Well, I see lots of travel mugs at thrift stores (maybe it's just us up here in coffeetown central, USA, aka the Pacific Northwest with our coffee addiction resulting in a surplus of travel mugs), but these seem relatively easy to come by at the thrift store. So if you're a cheap-o like me, I'd check a local thrift shop first before dropping some bones for a new one. I've noticed that people like to leave their empty paper coffee cups on random shelves at thrift stores too, though, so make sure you're not picking up the dregs of someone's old caramel macchiato. Has anyone else noticed this? I swear every time I thrift I find at least one old, empty Starbucks paper cup left on a shelf of knick knacks. Us thrifters are well-caffeinated folks, I guess. Also, forgetful? Or lazy? I'm not sure which.
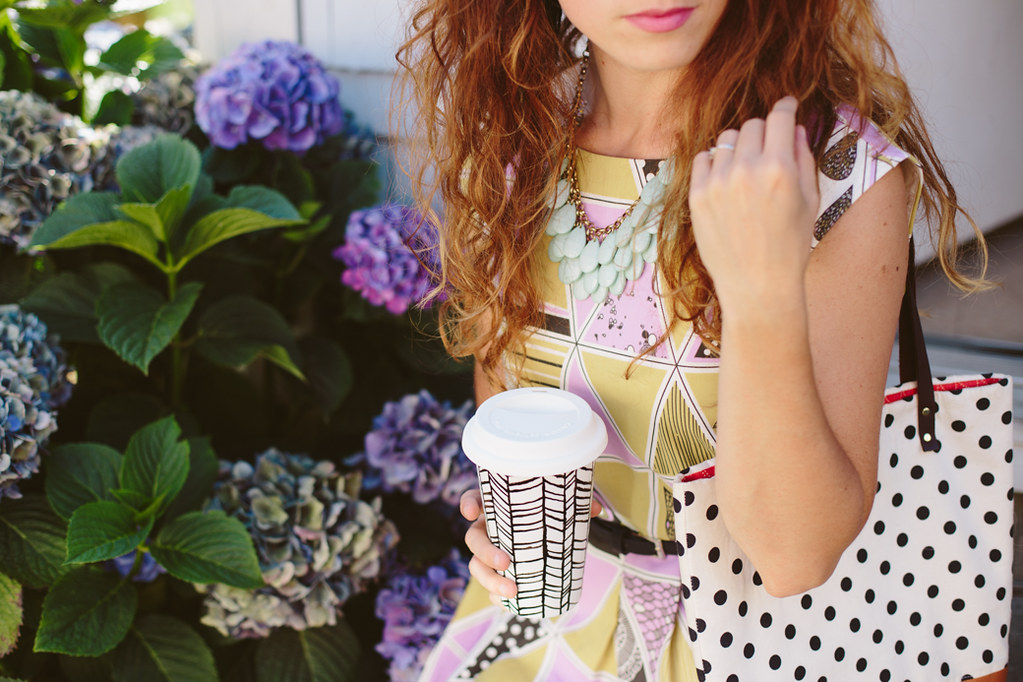
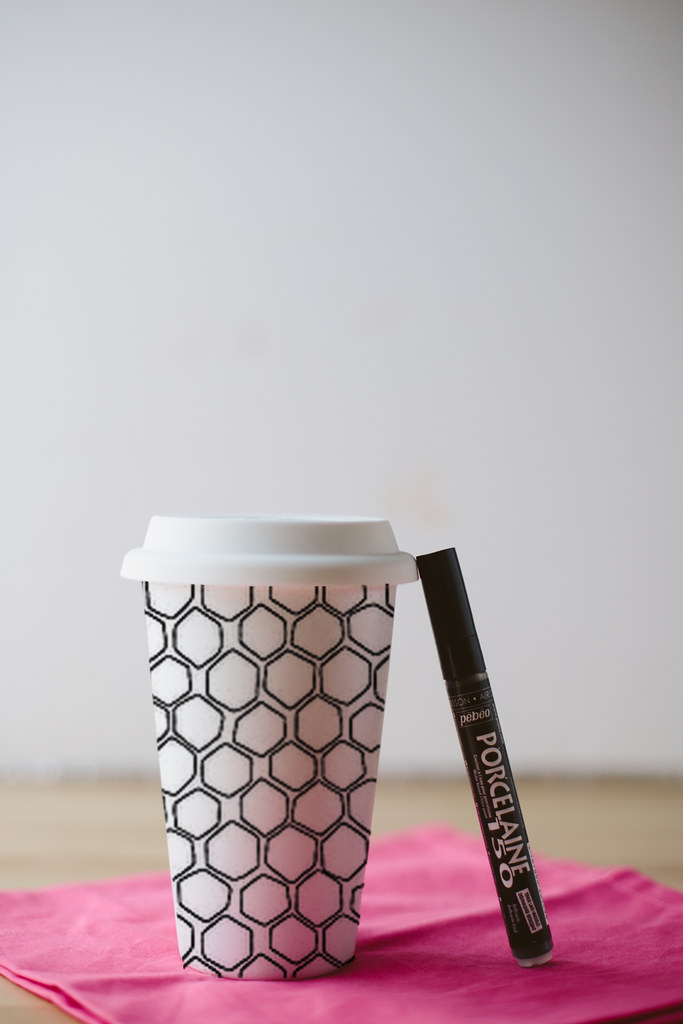
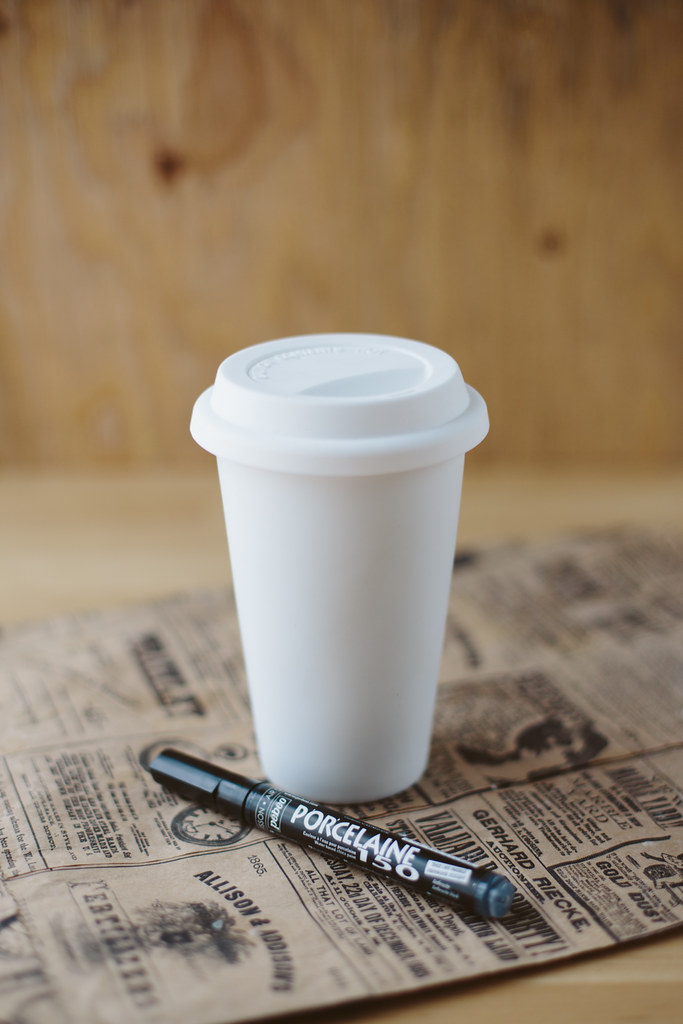
What you'll need:
Porcelain Travel Mug
Pencil (optional)
Pebeo Porcelaine paint pen
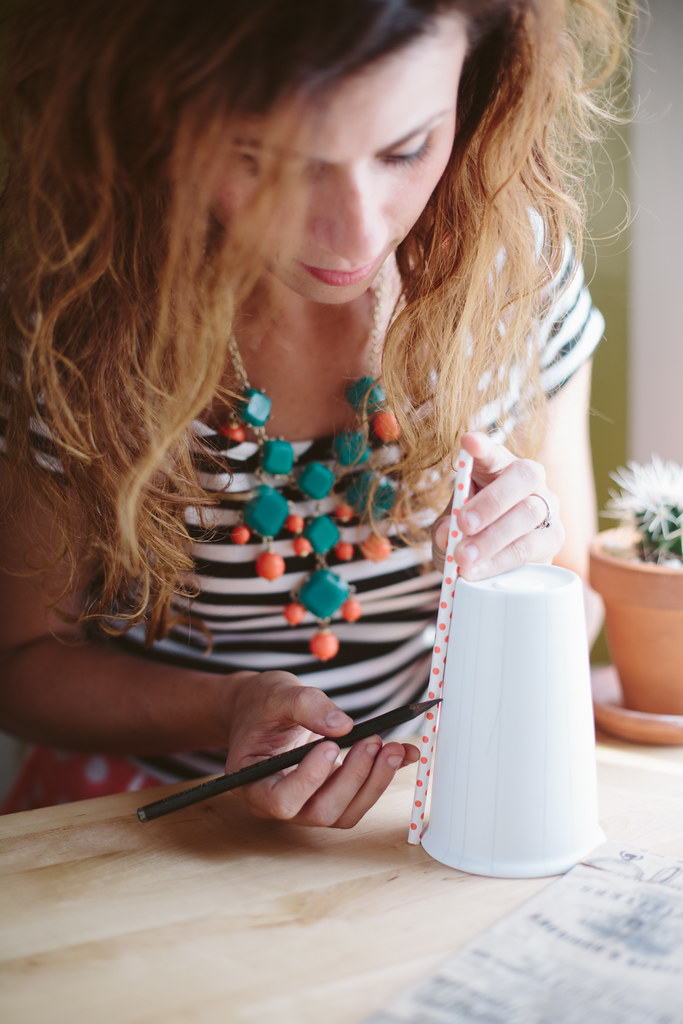
If you're making a more complex pattern, like the herringbone pattern I did, you can sketch it on there with a pencil first, to have some light lines to follow. Something more simple, like polka dots, probably wouldn't require this, but I wanted to make sure everything fit right. If you want to just jump right into painting, though, go ahead! I used a straw to help guide my vertical pencil lines so they were parallel and straight. Then I drew in the angled lines.
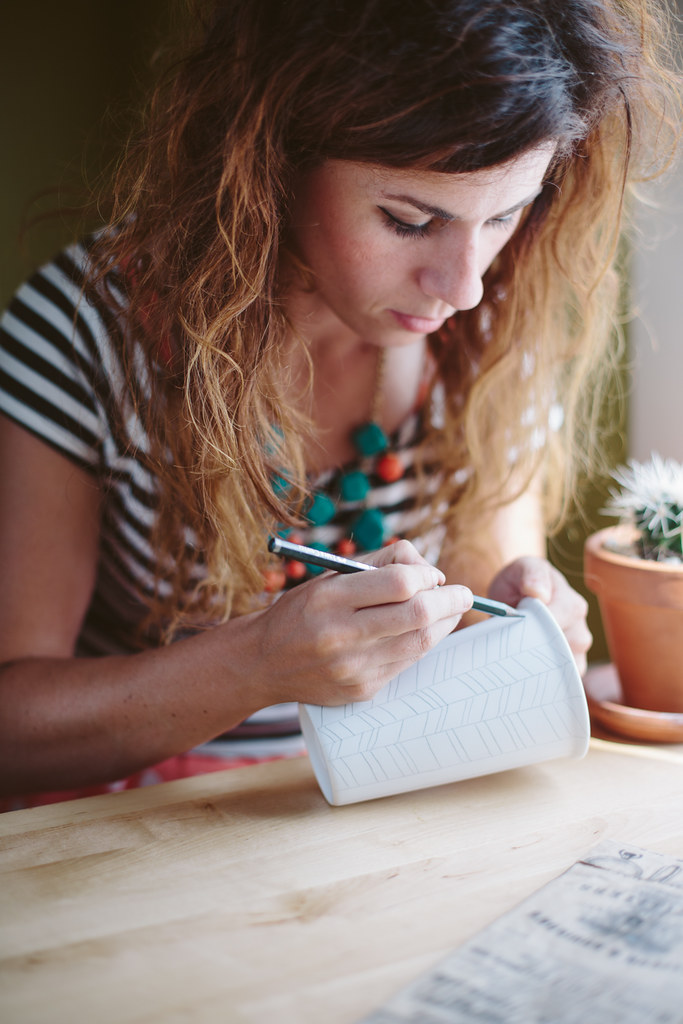
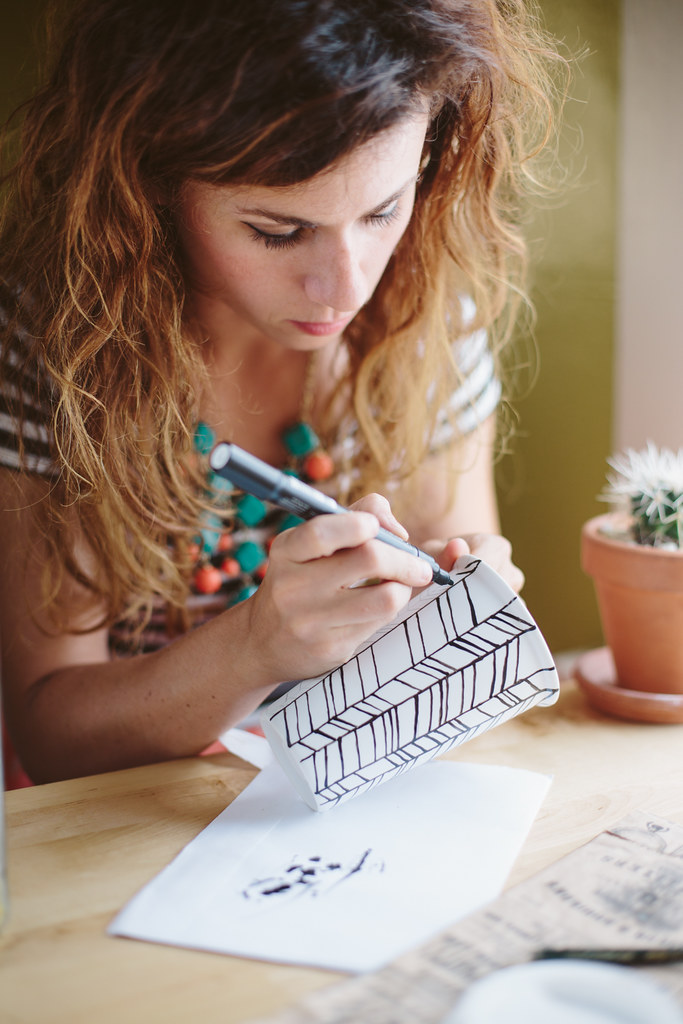
Next, just follow your pencil template with the paint pen. You'll have to push down on the pen tip to get the ink flowing. I had to push down on mine pretty frequently to make sure the paint flowed freely. Have a scrap piece of paper on hand to prime the pen when you need to. Be careful not to smudge the wet paint.
Set the mug aside and let it air dry for 72 hours. If you want to make your design dishwasher safe, put the mug in the oven at 300ºF for 30 minutes to bake the paint on permanently. Voila! Fancy, custom, reusable travel mug! Drink your hot beverages in style!
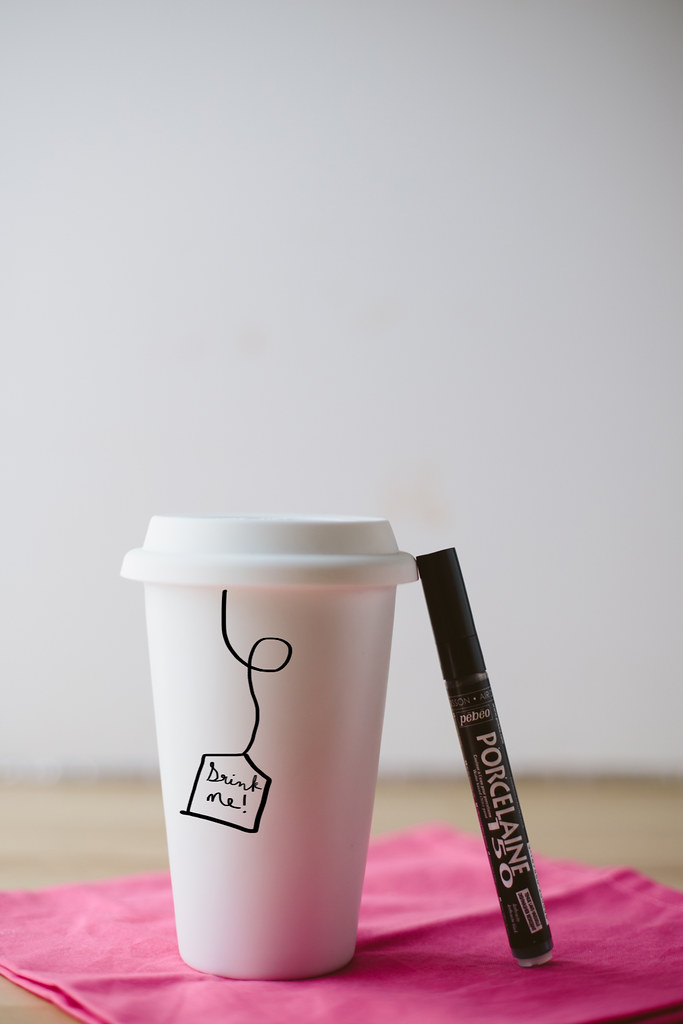
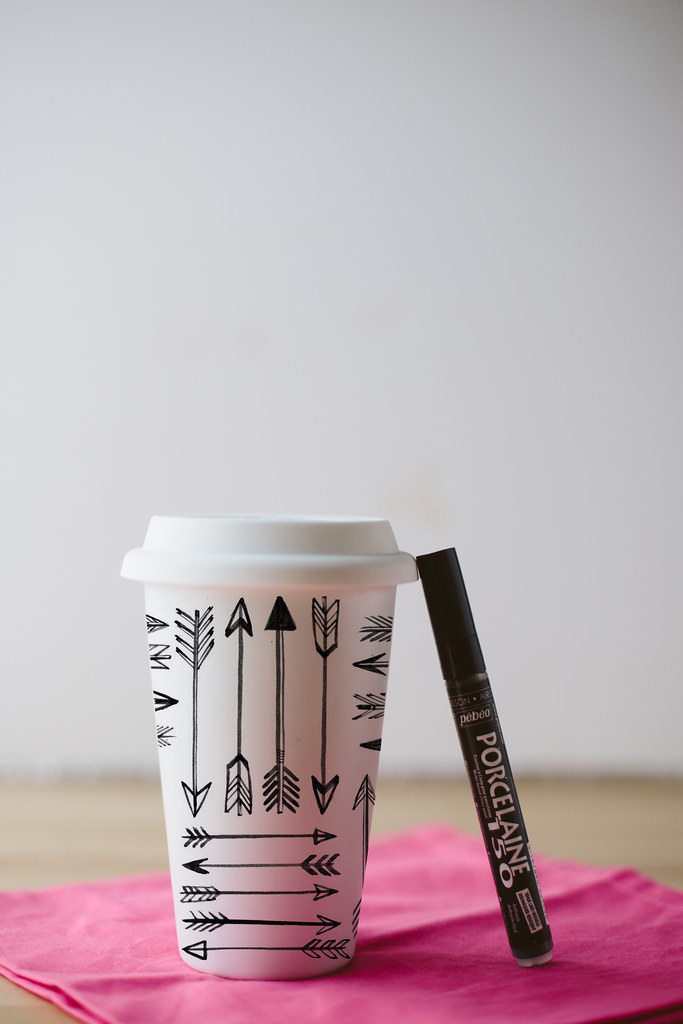
I used a white mug, but I know that they sell them in many different colors, so if you wanted a more colorful version, just buy a plain, colored mug instead of a white one and draw on your pattern. At the bottom of the post I included some more fun pattern ideas if you're not into the herringbone. The sky's the limit!
![]()
![]()
![]()